大家好,上一节我讲了一下如何通过LocationManager来获取Location,没有看过上一节的同学,可以点击如下链接返回查看:
Android高手进阶教程(十三)---Android Location的使用!
我们获取Location的目的之一肯定是有获取这个位置的详细地址,而我们有了Location在来获取Address就相对简单多了,因为GoogleApi已经封装好了方法,我们只需呀通过Location获取GeoPoint,然后在通过GeoPoint来获取我们想要的Address.下面是我做的一个简单的Demo.
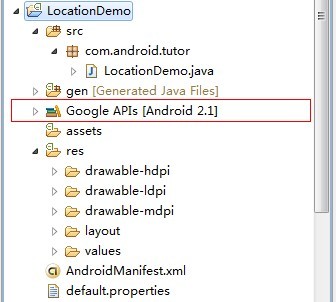
第一步新建一个Android工程LocationDemo,注意这里选用的是(Google APIs),下面是文件目录结构:
第二步: 修改main.xml(相比第十四节增加了一个address的TextView),代码如下:
- <?xmlversion="1.0"encoding="utf-8"?>
- <LinearLayoutxmlns:android="http://schemas.android.com/apk/res/android"
- android:orientation="vertical"
- android:layout_width="fill_parent"
- android:layout_height="fill_parent"
- >
- <TextView
- android:id="@+id/longitude"
- android:layout_width="fill_parent"
- android:layout_height="wrap_content"
- android:text="longitude:"
- />
- <TextView
- android:id="@+id/latitude"
- android:layout_width="fill_parent"
- android:layout_height="wrap_content"
- android:text="latitude:"
- />
- <TextView
- android:id="@+id/address"
- android:layout_width="fill_parent"
- android:layout_height="wrap_content"
- />
- </LinearLayout>
第三步:修改LocationDemo.java(增加了两个方法)代码如下:
- packagecom.android.tutor;
- importjava.util.List;
- importjava.util.Locale;
- importcom.google.android.maps.GeoPoint;
- importandroid.app.Activity;
- importandroid.content.Context;
- importandroid.location.Address;
- importandroid.location.Geocoder;
- importandroid.location.Location;
- importandroid.location.LocationManager;
- importandroid.os.Bundle;
- importandroid.widget.TextView;
- publicclassLocationDemoextendsActivity{
- privateTextViewlongitude;
- privateTextViewlatitude;
- privateTextViewaddress;
- @Override
- publicvoidonCreate(BundlesavedInstanceState){
- super.onCreate(savedInstanceState);
- setContentView(R.layout.main);
- longitude=(TextView)findViewById(R.id.longitude);
- latitude=(TextView)findViewById(R.id.latitude);
- address=(TextView)findViewById(R.id.address);
- LocationmLocation=getLocation(this);
- GeoPointgp=getGeoByLocation(mLocation);
- AddressmAddress=getAddressbyGeoPoint(this,gp);
- longitude.setText("Longitude:"+mLocation.getLongitude());
- latitude.setText("Latitude:"+mLocation.getLatitude());
- address.setText("Address:"+mAddress.getCountryName()+","+mAddress.getLocality());
- }
- publicLocationgetLocation(Contextcontext){
- LocationManagerlocMan=(LocationManager)context
- .getSystemService(Context.LOCATION_SERVICE);
- Locationlocation=locMan
- .getLastKnownLocation(LocationManager.GPS_PROVIDER);
- if(location==null){
- location=locMan
- .getLastKnownLocation(LocationManager.NETWORK_PROVIDER);
- }
- returnlocation;
- }
- publicGeoPointgetGeoByLocation(Locationlocation){
- GeoPointgp=null;
- try{
- if(location!=null){
- doublegeoLatitude=location.getLatitude()*1E6;
- doublegeoLongitude=location.getLongitude()*1E6;
- gp=newGeoPoint((int)geoLatitude,(int)geoLongitude);
- }
- }catch(Exceptione){
- e.printStackTrace();
- }
- returngp;
- }
- publicAddressgetAddressbyGeoPoint(Contextcntext,GeoPointgp){
- Addressresult=null;
- try{
- if(gp!=null){
- Geocodergc=newGeocoder(cntext,Locale.CHINA);
- doublegeoLatitude=(int)gp.getLatitudeE6()/1E6;
- doublegeoLongitude=(int)gp.getLongitudeE6()/1E6;
- List<Address>lstAddress=gc.getFromLocation(geoLatitude,
- geoLongitude,1);
- if(lstAddress.size()>0){
- result=lstAddress.get(0);
- }
- }
- }catch(Exceptione){
- e.printStackTrace();
- }
- returnresult;
- }
- }
第四步:最重要一步在AndroidManiefest.xml中导入Google Api(第14行代码)库,代码如下:
- <?xmlversion="1.0"encoding="utf-8"?>
- <manifestxmlns:android="http://schemas.android.com/apk/res/android"
- package="com.android.tutor"
- android:versionCode="1"
- android:versionName="1.0">
- <applicationandroid:icon="@drawable/icon"android:label="@string/app_name">
- <activityandroid:name=".LocationDemo"
- android:label="@string/app_name">
- <intent-filter>
- <actionandroid:name="android.intent.action.MAIN"/>
- <categoryandroid:name="android.intent.category.LAUNCHER"/>
- </intent-filter>
- </activity>
- <uses-libraryandroid:name="com.google.android.maps"/>
- </application>
- <uses-sdkandroid:minSdkVersion="7"/>
- <uses-permissionandroid:name="android.permission.ACCESS_FINE_LOCATION"/>
- </manifest>
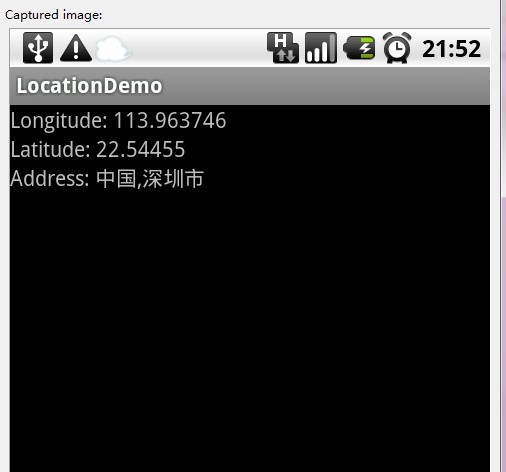
第五步:运行上述工程,效果如下图如示:
OK,今天就到这里,如果有什么不明白的,或者想要源代码的,请留下问题或者邮箱。Thx~
大家好,上一节我讲了一下如何通过LocationManager来获取Location,没有看过上一节的同学,可以点击如下链接返回查看:
Android高手进阶教程(十三)---Android Location的使用!
我们获取Location的目的之一肯定是有获取这个位置的详细地址,而我们有了Location在来获取Address就相对简单多了,因为GoogleApi已经封装好了方法,我们只需呀通过Location获取GeoPoint,然后在通过GeoPoint来获取我们想要的Address.下面是我做的一个简单的Demo.
第一步新建一个Android工程LocationDemo,注意这里选用的是(Google APIs),下面是文件目录结构:
第二步: 修改main.xml(相比第十四节增加了一个address的TextView),代码如下:
- <?xmlversion="1.0"encoding="utf-8"?>
- <LinearLayoutxmlns:android="http://schemas.android.com/apk/res/android"
- android:orientation="vertical"
- android:layout_width="fill_parent"
- android:layout_height="fill_parent"
- >
- <TextView
- android:id="@+id/longitude"
- android:layout_width="fill_parent"
- android:layout_height="wrap_content"
- android:text="longitude:"
- />
- <TextView
- android:id="@+id/latitude"
- android:layout_width="fill_parent"
- android:layout_height="wrap_content"
- android:text="latitude:"
- />
- <TextView
- android:id="@+id/address"
- android:layout_width="fill_parent"
- android:layout_height="wrap_content"
- />
- </LinearLayout>
第三步:修改LocationDemo.java(增加了两个方法)代码如下:
- packagecom.android.tutor;
- importjava.util.List;
- importjava.util.Locale;
- importcom.google.android.maps.GeoPoint;
- importandroid.app.Activity;
- importandroid.content.Context;
- importandroid.location.Address;
- importandroid.location.Geocoder;
- importandroid.location.Location;
- importandroid.location.LocationManager;
- importandroid.os.Bundle;
- importandroid.widget.TextView;
- publicclassLocationDemoextendsActivity{
- privateTextViewlongitude;
- privateTextViewlatitude;
- privateTextViewaddress;
- @Override
- publicvoidonCreate(BundlesavedInstanceState){
- super.onCreate(savedInstanceState);
- setContentView(R.layout.main);
- longitude=(TextView)findViewById(R.id.longitude);
- latitude=(TextView)findViewById(R.id.latitude);
- address=(TextView)findViewById(R.id.address);
- LocationmLocation=getLocation(this);
- GeoPointgp=getGeoByLocation(mLocation);
- AddressmAddress=getAddressbyGeoPoint(this,gp);
- longitude.setText("Longitude:"+mLocation.getLongitude());
- latitude.setText("Latitude:"+mLocation.getLatitude());
- address.setText("Address:"+mAddress.getCountryName()+","+mAddress.getLocality());
- }
- publicLocationgetLocation(Contextcontext){
- LocationManagerlocMan=(LocationManager)context
- .getSystemService(Context.LOCATION_SERVICE);
- Locationlocation=locMan
- .getLastKnownLocation(LocationManager.GPS_PROVIDER);
- if(location==null){
- location=locMan
- .getLastKnownLocation(LocationManager.NETWORK_PROVIDER);
- }
- returnlocation;
- }
- publicGeoPointgetGeoByLocation(Locationlocation){
- GeoPointgp=null;
- try{
- if(location!=null){
- doublegeoLatitude=location.getLatitude()*1E6;
- doublegeoLongitude=location.getLongitude()*1E6;
- gp=newGeoPoint((int)geoLatitude,(int)geoLongitude);
- }
- }catch(Exceptione){
- e.printStackTrace();
- }
- returngp;
- }
- publicAddressgetAddressbyGeoPoint(Contextcntext,GeoPointgp){
- Addressresult=null;
- try{
- if(gp!=null){
- Geocodergc=newGeocoder(cntext,Locale.CHINA);
- doublegeoLatitude=(int)gp.getLatitudeE6()/1E6;
- doublegeoLongitude=(int)gp.getLongitudeE6()/1E6;
- List<Address>lstAddress=gc.getFromLocation(geoLatitude,
- geoLongitude,1);
- if(lstAddress.size()>0){
- result=lstAddress.get(0);
- }
- }
- }catch(Exceptione){
- e.printStackTrace();
- }
- returnresult;
- }
- }
第四步:最重要一步在AndroidManiefest.xml中导入Google Api(第14行代码)库,代码如下:
- <?xmlversion="1.0"encoding="utf-8"?>
- <manifestxmlns:android="http://schemas.android.com/apk/res/android"
- package="com.android.tutor"
- android:versionCode="1"
- android:versionName="1.0">
- <applicationandroid:icon="@drawable/icon"android:label="@string/app_name">
- <activityandroid:name=".LocationDemo"
- android:label="@string/app_name">
- <intent-filter>
- <actionandroid:name="android.intent.action.MAIN"/>
- <categoryandroid:name="android.intent.category.LAUNCHER"/>
- </intent-filter>
- </activity>
- <uses-libraryandroid:name="com.google.android.maps"/>
- </application>
- <uses-sdkandroid:minSdkVersion="7"/>
- <uses-permissionandroid:name="android.permission.ACCESS_FINE_LOCATION"/>
- </manifest>
第五步:运行上述工程,效果如下图如示:
OK,今天就到这里,如果有什么不明白的,或者想要源代码的,请留下问题或者邮箱。Thx~
分享到:


相关推荐
Android高手进阶教程之----通过Location获取Address的使用.doc Android基础教程之----Android ProgressBar的使用.doc Android基础教程之----Android中两种设置全屏的方法!!.doc Android基础教程之----Android状态栏...
Android开发—通过Location获取Address,获取手机一些信息
android-sdk_r24.4.1-windows和android-ndk-r10e-windows-x86_64。文件太大只能传到百度云上
android-location-tracker Android Simple Location Tracker is an Android library that helps you get user location with a object named LocationTracker Installation Add this to your build.gradle file ...
React Native Android Location Services对话框 从Android位置服务打开对话框的React-Native组件安装大多是自动安装(推荐) yarn add react-native-android-location-services-dialog-box 要么npm install react-...
android-get-current-location.7z
android-get-last-location-fused-api.7z
Android 是Google开发的基于Linux平台的开源手机操作系统。它包括操作系统、用户界面...【第一版第十四章】老罗Android开发视频--多线程编程(7集) 【第一版第十五章】老罗Android开发视频--百度地图实战开发(10集)
├─2.13 Nginx进阶基础-常见配置-location.mp4 ├─3.01 Nginx进阶配置提升-预定义变量及日志详解.mp4 ├─3.02 Nginx进阶配置提升-日志切割及升级.mp4 ├─3.03 Nginx进阶-配置提升-Nginx错误页面.mp4 ├─3.04 ...
Android library project that intends to simplify the usage of location providers and activity recognition with a nice fluid API. Supported Android versions: Android 4.0 Adding to your project You ...
通过学习,您可以打下牢固的理论根基,了解使用当前android 1.0 sdk编写定制移动程序所需的知识,还能灵活快捷地运用未来的增强功能构建最前沿的解决方案。 主要内容 ◆android移动开发的最佳实践 ◆简要介绍...
----------------------------------- Android 编程基础 1 封面----------------------------------- Android 编程基础 2 开放手机联盟 --Open --Open --Open --Open Handset Handset Handset Handset Alliance ...
Location-cleaned IOS16.0驱动包,亲测解压复制到drivers目录可用,你值得拥有。IOS16重大更新!需要去设置-隐私-开启开发者模式 需要去设置-隐私-打开开发者模式。没有开发者模式选项的,临时解决方法,下载爱思...
一些很不错的Android开发技巧,这个项目翻译自 android-tips-tricks 去掉了一些我认为不重要的,对我使用过的东东做了评价,同时翻译了一些自己没有注意到的知识点的文章。 :heart: star 支持一下 欢迎协作 了解你的...
<uses-permission android:name="android.permission.ACCESS_COARSE_LOCATION" /> <uses-permission android:name="android.permission.READ_PHONE_STATE" /> <uses-permission android:name="android.permission....
Locationmanager is a small wrapper for Location Tracker. Installation Add jitpackto your repositories in Project build.gradle : allprojects { repositories { ... maven { url "https://jitpack.io" }...
Location-cleaned使用的driver ,适配ios14.6,亲测可用
Location-cleaned15.2亲测定位有效驱动
Built for the ARCore Android SDK. Version 1.x is now for SceneForm projects, and will not be compatible with old versions of ARCore. If you are still using the older version of ARCore, change branch ...
android-location-service-源码.rar