- 浏览: 611519 次
- 性别:

- 来自: 杭州
-

文章分类
- 全部博客 (334)
- java core (12)
- struts2.x (2)
- spring (3)
- hibernate (8)
- jpa (6)
- maven (2)
- osgi (5)
- eclipse (4)
- struts2.x+spring2.x+hibernate 整合 (5)
- ebs (0)
- html (0)
- vaadin (1)
- css (0)
- jquery (0)
- javascript (0)
- svn (1)
- cvs (0)
- axas2.x (0)
- eclipse+maven (9)
- annotation (0)
- 基于OSGi的动态化系统搭建 (1)
- notenet (1)
- jboss eclipse (4)
- eclipse工具 (4)
- jdk1.6+maven3.0.3+nuxeo+svn+felix+cxf+spring+springDM (6)
- spring dm (1)
- Nexus介绍 (1)
- proxool listener (0)
- oracle (4)
- mysql (8)
- 搭建你的全文检索 (1)
- hibernatehibernatehibernate (0)
- cvsearchcvsearch (0)
- mycvseach (0)
- asdfasdfasdf (0)
- propertiey (0)
- hibernate annotation (0)
- libs (0)
- icam (2)
- start 数据库配置 (0)
- jboss (1)
- 让Eclipse启动时显示选择workspace的对话框 (1)
- table表头固定 (1)
- s2s3h4 (0)
- leaver (0)
- mycvsaerchddd (0)
- 关于jboss5.0.1部署 (4)
- bookmarks (0)
- PersistenceUnitDeployment (0)
- mycom (0)
- HKEY_CURRENT_USER = &H80000001 (0)
- syspath (1)
- css div (1)
- Dreamweaver CS5 (0)
- generate (0)
- mysql查看表结构命令 (1)
- LOG IN ERROR EMAIL TO SB (0)
- struts2 handle static resource (1)
- jsf (2)
- log4j (1)
- jbpm4.4 (2)
- down: jbpm4.4 (1)
- jstl1.2 (1)
- spring annotation (1)
- java design pattern (1)
- cache (1)
- ehcache (1)
- 11111 (0)
- myge (0)
- pom.xml (0)
- springquartz (0)
- OpenStack (9)
- hadoop (2)
- nginx (1)
- hadoop openstack (1)
- os (1)
- hadoop-2.6.0 zookeeper-3.4.6 hbase-0.98.9-hadoop2 集群 (5)
- hadoop2.7.0 ha Spark (2)
- tess (0)
- system (1)
- asdf (0)
- hbase (2)
- hbase create table error (1)
- ekl (1)
- gitignore (1)
- gitlab-ci.yml (1)
- shell (1)
- elasticsearch (2)
- Azkaban 3.0+ (1)
- centos用命令 (1)
- hive (1)
- kafka (1)
- CaptureBasic (0)
- CentOS7 (1)
- dev tools (1)
- README.md (1)
- Error (1)
- teamviewerd.service (1)
- scala (1)
- spark (1)
- standard (1)
- gitlab (1)
- IDEA (0)
- ApplicationContext (1)
- 传统数仓 (1)
- redis install (1)
- MYSQL AND COLUME (1)
- java版本选择 (1)
- hue (1)
- npm (1)
- es (1)
- 版本管理 (1)
- 升级npm版本 (1)
- git (1)
- 服务器参数设置 (1)
- 调大 IDEA 编译内存大小 (0)
- CentOS8安装GitLab (1)
- gitlab安装使用 (1)
最新评论
-
ssydxa219:
vim /etc/security/limits.confvi ...
ekl -
Gamehu520:
table中无数据
hbase 出现的问题 -
Xleer0102:
为什么都是只有问没有答,哭晕在厕所
hbase 出现的问题 -
jiajiao_5413:
itext table -
CoderDream:
不完整,缺com.tcs.org.demostic.pub.u ...
struts2.3.1.1+hibernate3.6.9Final+spring3.1.0+proxool+maven+annotation
1.CXF和spring整合需要准备如下jar包文件:
cxf 2.x.x.jar
wsdl4j-1.6.2.jar
XmlSchema-1.4.7.jar
jetty-util-7.5.3.v20111011.jar
jetty-server-7.5.3.v20111011.jar
jetty-http-7.5.3.v20111011.jar
jetty-io-7.5.3.v20111011.jar
jetty-continuation-7.5.3.v20111011.jar
commons-logging-1.1.1.jar
neethi-3.0.1.jar
log4j-1.216.jar
spring-asm-3.0.6.RELEASE.jar
spring-beans-3.0.6.RELEASE.jar
spring-context-3.0.6.RELEASE.jar
spring-expression-3.0.6.RELEASE.jar
spring-core-3.0.6.RELEASE.jar
spring-web-3.0.6.RELEASE.jar
这边我是用Spring的jar包是Spring官方提供的,并没有使用CXF中的Spring的jar文件。
添加这么多文件后,首先在web.xml中添加如下配置:
<!-- 加载 Spring 容器配置 -->
< listener >
<
listener-class
>
org.springframework.web.context.ContextLoaderListener
</
listener-class
>
</ listener >
<!-- 设置 Spring 容器加载配置文件路径 -->
< context-param >
<
param-name
>
contextConfigLocation
</
param-name
>
<
param-value
>
classpath*:applicationContext-server.xml
</
param-value
>
</ context-param >
< listener >
<
listener-class
>
org.springframework.web.util.IntrospectorCleanupListener
</
listener-class
>
</ listener >
< servlet >
<
servlet-name
>
CXFService
</ servlet-name >
<
servlet-class
>
org.apache.cxf.transport.servlet.CXFServlet
</ servlet-class >
</ servlet >
< servlet-mapping >
<
servlet-name
>
CXFService
</ servlet-name >
<
url-pattern
>
/*
</
url-pattern
>
</ servlet-mapping >
然后在 src 目录中,新建一个 applicationContext-server.xml 文件,文件内容如下:
<? xml version ="1.0" encoding ="UTF-8" ? >
<
beans
xmlns
="http://www.springframework.org/schema/beans"
xmlns:context
="http://www.springframework.org/schema/context"
xmlns:jaxws
="http://cxf.apache.org/jaxws"
<!-- [if !supportLineBreakNewLine]-->
<!-- [endif]-->
xmlns:xsi
="http://www.w3.org/2001/XMLSchema-instance"
xsi:schemaLocation
="http://www.springframework.org/schema/beans
>
http://www.springframework.org/schema/beans/spring-beans-3.0.xsd
http://www.springframework.org/schema/context
http://www.springframework.org/schema/context/spring-context-3.0.xsd
http://cxf.apache.org/jaxws
http://cxf.apache.org/schemas/jaxws.xsd
"
注意上面的带下划线加粗部分,这个很重要的哦!不能写错或是遗漏了。
添加完这个文件后,还需要在这个文件中导入这么几个文件。文件内容如下:
<
import
resource
="classpath:META-INF/cxf/cxf.xml"
/>
<
import
resource
="classpath:META-INF/cxf/cxf-extension-soap.xml"
/>
<
import
resource
="classpath:META-INF/cxf/cxf-servlet.xml"
/>
下面开始写服务器端代码,首先定制服务器端的接口,代码如下:
package
com.hoo.service;
import
javax.jws.WebParam;
import
javax.jws.WebService;
import
javax.jws.soap.SOAPBinding;
import
javax.jws.soap.SOAPBinding.Style;
import
com.hoo.entity.User;
import
com.hoo.entity.Users;
/**
* <b>function:</b> 定制客户端请求 WebService 所需要的接口
* @file ComplexUserService.java
* @package com.hoo.service
* @project CXFWebService
* @version 1.0
*/
@WebService
@SOAPBinding(style = Style.RPC)
public
interface
IComplexUserService {
public
User getUserByName(@WebParam(name =
"name"
) String name);
public
void
setUser(User user);
}
下面编写 WebService 的实现类,服务器端实现代码如下:
package
com.hoo.service;
import
java.util.ArrayList;
import
java.util.Date;
import
java.util.HashMap;
import
java.util.List;
import
javax.jws.WebParam;
import
javax.jws.WebService;
import
javax.jws.soap.SOAPBinding;
import
javax.jws.soap.SOAPBinding.Style;
import
com.hoo.entity.User;
import
com.hoo.entity.Users;
/**
* <b>function:</b> WebService 传递复杂对象,如 JavaBean 、 Array 、 List 、 Map 等
* @file ComplexUserService.java
* @package com.hoo.service
* @project CXFWebService
* @version 1.0
*/
@WebService
@SOAPBinding(style = Style.RPC)
@SuppressWarnings(
"deprecation"
)
public
class
ComplexUserService
implements
IComplexUserService {
public
User getUserByName(@WebParam(name =
"name"
) String name) {
User user =
new
User();
user.setId(
new
Date().getSeconds());
user.setName(name);
user.setAddress(
"china"
);
user.setEmail(name +
"@hoo.com"
);
return
user;
}
public
void
setUser(User user) {
System.out.println(
"############Server setUser###########"
);
System.out.println(
"setUser:"
+ user);
}
}
注意的是和 Spring 集成,这里一定要完成接口实现,如果没有接口的话会有错误的。
下面要在 applicationContext-server.xml 文件中添加如下配置:
<
bean
id
="userServiceBean"
class
="com.hoo.service.ComplexUserService"
/>
<
bean
id
="inMessageInterceptor"
class
="com.hoo.interceptor.MessageInterceptor"
>
<
constructor-arg
value
="receive"
/>
</
bean
>
<
bean
id
="outLoggingInterceptor"
class
="org.apache.cxf.interceptor.LoggingOutInterceptor"
/>
<!-- 注意下面的 address ,这里的 address 的名称就是访问的 WebService 的 name -->
<
jaxws:server
id
="userService"
serviceClass
="com.hoo.service.IComplexUserService"
address
="/Users"
>
<
jaxws:serviceBean
>
<!-- 要暴露的 bean 的引用 -->
<
ref
bean
="userServiceBean"
/>
</
jaxws:serviceBean
>
<
jaxws:inInterceptors
>
<
ref
bean
="inMessageInterceptor"
/>
</
jaxws:inInterceptors
>
<
jaxws:outInterceptors
>
<
ref
bean
="outLoggingInterceptor"
/>
</
jaxws:outInterceptors
>
</
jaxws:server
>
下面启动 tomcat 服务器后,在 WebBrowser 中请求:
http://localhost:8080/CXFWebService/Users?wsdl
如果你能看到 wsdl 的 xml 文件的内容,就说明你成功了,注意的是上面地址的 Users 就是上面 xml 配置中的 address 的名称,是一一对应的。
下面编写客户端请求的代码,代码如下:
package
com.hoo.client;
import
org.apache.cxf.jaxws.JaxWsProxyFactoryBean;
import
com.hoo.entity.User;
import
com.hoo.service.IComplexUserService;
/**
* <b>function:</b> 请求 Spring 整合 CXF 的 WebService 客户端
* @file SpringUsersWsClient.java
* @package com.hoo.client
* @project CXFWebService
* @version 1.0
*/
public
class
SpringUsersWsClient {
public
static
void
main(String[] args) {
// 调用 WebService
JaxWsProxyFactoryBean factory =
new
JaxWsProxyFactoryBean();
factory.setServiceClass(IComplexUserService.
class
);
factory.setAddress(
"http://localhost:8080/CXFWebService/Users"
);
IComplexUserService service = (IComplexUserService) factory.create();
System.out.println(
"#############Client getUserByName##############"
);
User user = service.getUserByName(
"haodi"
);
System.out.println(user);
user.setAddress(
"China-Huangzhou"
);
service.setUser(user);
}
}
运行后,可以在控制台中看到
log4j:WARN
No appenders could be found for
logger
(org.apache.cxf.bus.spring.BusApplicationContext).
log4j:WARN Please initialize the log4j system properly.
log4j:WARN See http://logging.apache.org/log4j/1.2/faq.html#noconfig
for more info.
2011-3-28 18:12:26 org.apache.cxf.service.factory.ReflectionServiceFactoryBean
buildServiceFromClass
信息
: Creating Service {http://service.hoo.com/}IComplexUserServiceService from class
com.hoo.service.IComplexUserService
#############Client getUserByName##############
27#hoojo#hoojo@hoo.com#china
Tomcat
控制台
<!-- [if gte vml 1]><v:shapetype
id="_x0000_t75" coordsize="21600,21600" o:spt="75" o:preferrelative="t"
path="m@4@5l@4@11@9@11@9@5xe" filled="f" stroked="f">
<v:stroke joinstyle="miter"/>
<v:formulas>
<v:f eqn="if lineDrawn pixelLineWidth 0"/>
<v:f eqn="sum @0 1 0"/>
<v:f eqn="sum 0 0 @1"/>
<v:f eqn="prod @2 1 2"/>
<v:f eqn="prod @3 21600 pixelWidth"/>
<v:f eqn="prod @3 21600 pixelHeight"/>
<v:f eqn="sum @0 0 1"/>
<v:f eqn="prod @6 1 2"/>
<v:f eqn="prod @7 21600 pixelWidth"/>
<v:f eqn="sum @8 21600 0"/>
<v:f eqn="prod @7 21600 pixelHeight"/>
<v:f eqn="sum @10 21600 0"/>
</v:formulas>
<v:path o:extrusionok="f" gradientshapeok="t" o:connecttype="rect"/>
<o:lock v:ext="edit" aspectratio="t"/>
</v:shapetype><v:shape id="Picture_x0020_1" o:spid="_x0000_i1025" type="#_x0000_t75"
alt="image"
href="http://images.cnblogs.com/cnblogs_com/hoojo/201103/201103301049197217.png"
style='width:483pt;height:330.75pt;visibility:visible;mso-wrap-style:square'
o:button="t">
<v:imagedata src="file:///C:\DOCUME~1\565386\LOCALS~1\Temp\msohtmlclip1\01\clip_image001.png"
o:title="image"/>
</v:shape><![endif]--><!-- [if !vml]-->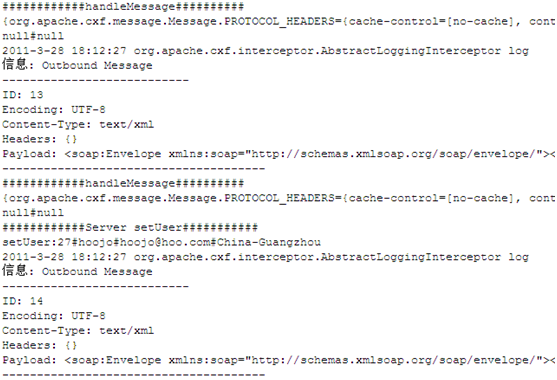
这个 server 端是通过 Spring 整合配置的,下面我们将 Client 端也通过 Spring 配置完成整合。
首先增加 applicationContext-client.xml 配置文件,文件内容如下:
<?
xml
version
="1.0"
encoding
="UTF-8"
?
>
<
beans
xmlns
="http://www.springframework.org/schema/beans"
xmlns:context
="http://www.springframework.org/schema/context"
xmlns:jaxws
="http://cxf.apache.org/jaxws"
xmlns:xsi
="http://www.w3.org/2001/XMLSchema-instance"
xsi:schemaLocation
="http://www.springframework.org/schema/beans
>
http://www.springframework.org/schema/beans/spring-beans-3.0.xsd
http://www.springframework.org/schema/context
http://www.springframework.org/schema/context/spring-context-3.0.xsd
http://cxf.apache.org/jaxws
http://cxf.apache.org/schemas/jaxws.xsd"
<
import
resource
="classpath:META-INF/cxf/cxf.xml"
/>
<
import
resource
="classpath:META-INF/cxf/cxf-extension-soap.xml"
/>
<
import
resource
="classpath:META-INF/cxf/cxf-servlet.xml"
/>
<
jaxws:client
id
="userWsClient"
serviceClass
="com.hoo.service.IComplexUserService"
address
="http://localhost:8080/CXFWebService/Users"
/>
</
beans
>
客户端请求代码如下:
package
com.hoo.client;
import
org.apache.cxf.jaxws.JaxWsProxyFactoryBean;
import
org.springframework.context.ApplicationContext;
import
org.springframework.context.support.ClassPathXmlApplicationContext;
import
com.hoo.entity.User;
import
com.hoo.service.IComplexUserService;
/**
* <b>function:</b> 请求 Spring 整合 CXF 的 WebService 客户端
* @file SpringUsersWsClient.java
* @package com.hoo.client
* @project CXFWebService
* @version 1.0
*/
public
class
SpringUsersWsClient {
public
static
void
main(String[] args) {
ApplicationContext ctx =
new
ClassPathXmlApplicationContext(
"applicationContext-client.xml"
);
IComplexUserService service =
ctx.getBean(
"userWsClient"
, IComplexUserService.
class
);
System.out.println(
"#############Client getUserByName##############"
);
User user = service.getUserByName(
"hoojo"
);
System.out.println(user);
user.setAddress(
"China-Guangzhou"
);
service.setUser(user);
}
}
运行后结果如下:
#############Client getUserByName##############
45#hoojo#hoojo@hoo.com#china
############Server setUser###########
setUser:45#haodi#haodi@hoo.com#China-Huangzhou
新建一个 web项目,命名为: CXFServer
建一个包: com.server.dao
在该包下面建一个接口,命名为: Hello,具体代码如下:
package com.server.dao;
import javax.jws.WebService;
@WebService
public interface Hello {
public String hello(String username);
}
新建一个包: com.server.service
在该包下建一个现实类,命名为: HelloImpl具体代码如下:
package com.server.service;
import javax.jws.WebService;
import com.server.dao.Hello;
@WebService
public class HelloImpl implements Hello {
public String hello(String username) {
System.out.println("server is called!");
return "sayHello" + username;
}
}
既然要用到 Spring,那么就少不了在 web.xml里面配置 Spring的过滤器!
在 web.xml配置 Spring,如下所示:
<? xml version = "1.0" encoding = "UTF-8" ?>
< web-app version = "2.4" xmlns = "http://java.sun.com/xml/ns/j2ee"
xmlns:xsi = "http://www.w3.org/2001/XMLSchema-instance"
xsi:schemaLocation = "http://java.sun.com/xml/ns/j2ee
http://java.sun.com/xml/ns/j2ee/web-app_2_4.xsd" >
< welcome-file-list >
< welcome-file > index.jsp </ welcome-file >
</ welcome-file-list >
< servlet >
< description > apache cxf 配置 webservice 服务 </ description >
< servlet-name > cxf </ servlet-name >
< servlet-class > org.apache.cxf.transport.servlet.CXFServlet </ servlet-class >
< load-on-startup > 1 </ load-on-startup >
</ servlet >
< servlet-mapping >
< servlet-name > cxf </ servlet-name >
< url-pattern > /services/* </ url-pattern >
</ servlet-mapping >
< listener >
< description > spring 的监听 </ description >
< listener-class > org.springframework.web.context.ContextLoaderListener </ listener-class >
</ listener >
< context-param >
< description > spring 的配置文件加载路径 </ description >
< param-name > contextConfigLocation </ param-name >
< param-value > classpath *:applicationContext*.xml </ param-value >
</ context-param >
</ web-app >
项目增加 Spring功能后,那么就要配置 Spring文件了!
Spring配置文件如下 ;
<? xml version = "1.0" encoding = "UTF-8" ?>
< beans xmlns = "http://www.springframework.org/schema/beans"
xmlns:xsi = "http://www.w3.org/2001/XMLSchema-instance"
xmlns:jaxws = "http://cxf.apache.org/jaxws"
xsi:schemaLocation = "http://www.springframework.org/schema/beans
http://www.springframework.org/schema/beans/spring-beans.xsd
http://cxf.apache.org/jaxws
http://cxf.apache.org/schemas/jaxws.xsd" >
< import resource = "classpath:META-INF/cxf/cxf.xml" />
< import resource = "classpath:META-INF/cxf/cxf-extension-soap.xml" />
< import resource = "classpath:META-INF/cxf/cxf-servlet.xml" />
< jaxws:endpoint id = "service"
implementor = "com.server.service.HelloImpl" address = "/webserviceHello" />
</ beans >
< import resource = "classpath:META-INF/cxf/cxf.xml" />
< import resource = "classpath:META-INF/cxf/cxf-extension-soap.xml" />
< import resource = "classpath:META-INF/cxf/cxf-servlet.xml" />
这 3句是固定的一个配置!
< jaxws:endpoint id = "service"
implementor = "com.server.service.HelloImpl" address = "/webserviceHello" />
id :指在 spring 配置的 bean 的 ID.
Implementor: 指明具体的实现类 .
Address: 指明这个 web service 的相对地址
把项目发布到 tomcat 上,启动 tomcat ,在浏览器打开 http://localhost:8080/CXFServer/services/webserviceHello?wsdl 能现实如下界面,证明服务器已经成功发布了!

有的同学可能会对这个访问地址存在疑问:
http://localhost:8080/CXFServer/services/webserviceHello?wsdl
问什么是这样子的访问地址呢?
http://localhost:8080/CXFServer 是本项目的访问地址
services 是由于 web.xml 配置所得:
< servlet-mapping >
< servlet-name > cxf </ servlet-name >
< url-pattern > /services/* </ url-pattern >
</ servlet-mapping >
webserviceHello 是由于 Spring 配置文件中的 address 属性所得:
< jaxws:endpoint id = "service"
implementor = "com.server.service.HelloImpl" address = "/webserviceHello" />
现在服务器发布成功了,接着就写客户端程序了!
新建一个 web项目,命名为 ;CXFClient
建一个包 ;com.server.dao(这个接口的包名要与服务器接口包名一样)
建一个接口: Hello (最好与服务器的接口名字一样)
代码如下:
package com.server.dao;
import javax.jws.WebService;
@WebService
public interface Hello {
// 这里的方法名必须与服务器接口的方法一样
public String hello(String username);
}
新建一个测试类: Test
代码如下:
import org.springframework.context.ApplicationContext;
import org.springframework.context.support.ClassPathXmlApplicationContext;
public class Test {
public static void main(String[] args) {
ApplicationContext context = new ClassPathXmlApplicationContext( "classpath:applicationContext*.xml" );
Hello service = (Hello) context.getBean( "webServiceClient" );
System. out .println(service.hello( " 和谐 dota" ));
}
}
代码基本上完成了,现在为项目增加 Spring 功能, web.xml 配置文件如下:
<? xml version = "1.0" encoding = "UTF-8" ?>
< web-app version = "2.4" xmlns = "http://java.sun.com/xml/ns/j2ee"
xmlns:xsi = "http://www.w3.org/2001/XMLSchema-instance"
xsi:schemaLocation = "http://java.sun.com/xml/ns/j2ee
http://java.sun.com/xml/ns/j2ee/web-app_2_4.xsd" >
< welcome-file-list >
< welcome-file > index.jsp </ welcome-file >
</ welcome-file-list >
< servlet >
< description > apache cxf 配置 webservice 服务 </ description >
< servlet-name > cxf </ servlet-name >
< servlet-class > org.apache.cxf.transport.servlet.CXFServlet </ servlet-class >
< load-on-startup > 1 </ load-on-startup >
</ servlet >
< servlet-mapping >
< servlet-name > cxf </ servlet-name >
< url-pattern > /services/* </ url-pattern >
</ servlet-mapping >
< listener >
< description > spring 的监听 </ description >
< listener-class > org.springframework.web.context.ContextLoaderListener </ listener-class >
</ listener >
< context-param >
< description > spring 的配置文件加载路径 </ description >
< param-name > contextConfigLocation </ param-name >
< param-value > classpath *:applicationContext*.xml </ param-value >
</ context-param >
</ web-app >
对应的 Spring配置文件如下所示:
<? xml version = "1.0" encoding = "UTF-8" ?>
< beans xmlns = "http://www.springframework.org/schema/beans"
xmlns:xsi = "http://www.w3.org/2001/XMLSchema-instance"
xmlns:jaxws = "http://cxf.apache.org/jaxws"
xsi:schemaLocation = "http://www.springframework.org/schema/beans
http://www.springframework.org/schema/beans/spring-beans.xsd
http://cxf.apache.org/jaxws
http://cxf.apache.org/schemas/jaxws.xsd" >
< import resource = "classpath:META-INF/cxf/cxf.xml" />
< import resource = "classpath:META-INF/cxf/cxf-extension-soap.xml" />
< import resource = "classpath:META-INF/cxf/cxf-servlet.xml" />
< jaxws:client id = "webServiceClient"
address = "http://localhost:8080/CXFServer/services/webserviceHello"
serviceClass = "com.server.dao.Hello" />
</ beans >
最后执行测试类: Test 的代码,控制台会打印出: sayHello 和谐 dota
到此, CXF 与 Spring 整合已经完成了!!希望能给你带来一点帮助!!
注解: Spring 配置文件放在 src 目录下就可以了!


发表评论

-
osgi +ssh
2013-01-11 21:49 38672.与流行的 JAVA B/S体系架构的集成 了解了基于os ... -
OSGI+Spring+Hibernate+...
2012-02-23 09:48 3723导论 “世间本无事,庸人自扰之” Sp ... -
mydemo
2012-02-22 11:21 0感谈三年 三年了,光阴似剪。老婆你对我做出的恭献,我不能回报 ... -
运用Spring DM和CXF来实现WebService的动态发布
2011-12-31 16:43 4160在JAXWS2.0发布以前,用JAVA发布一个WebServ ... -
cxf osgi
2011-12-29 10:31 1938先决条件 首先下载� ... -
Felix,ops4j
2011-12-26 17:34 31301. 创建Felix启动Bat: 讲Feli ...
相关推荐
CXF WebService整合Spring示例工程代码demo可以直接导入eclipse。参照网页http://www.cnblogs.com/hoojo/archive/2011/03/30/1999563.html 完成的webService服务提供。 大致步骤: 1.引入cxf和其他需要的jar包,(本...
Apache Cxf WebService整合Spring 处理Map、非javabean式的复合类等CXF无法自动转化的类型 CXF为服务器端和客户端添加自定义拦截器进行权限检查验证并且控制台打印日志
CXF WebService整合Spring代码(包含服务,客户端两个工程 和 文档) 需要视频的话,留邮箱
NULL 博文链接:https://angrycoder.iteye.com/blog/1433965
CXF_WebService整合Spring
WebService的CXF整合Spring有源码和jar包
webserivce.、cxf整合spring,用的是spring3和cxf3。欢迎大家下载尝试
webservice cxf spring整合返回list,bean,string,json,xml项目完整实例
cxf开发webservice与spring整合所需jar包
cxf与spring整合webservice所需jar
RT 项目在用的 好不容易配起来的 集成了interceptor 拦截机制 事务控制在Service层
webservice客户端,框架为CXF,整合spring
WebService小白学习 之 Spring整合CXF,添加拦截器。 博客学习地址:https://blog.csdn.net/qq_37902949/article/details/81262826
webservice cxf 整合spring例子源代码.相关博客的介绍: http://blog.csdn.net/dream_broken/article/details/35331949
cxf webservice 与spring整合的开发实例
webservice与spring整合学习文档,里面的项目部署上就可以使用
一、CXF WebService准备工作 二、CXF 入门示例 三、CXF对Interceptor拦截器的支持 四、CXF WebService中传递复杂类型对象 五、CXF整合Spring
cxf与spring整合,以及webservice传输验证demo