Angular-CLI
说到 cli 大家不陌生,每出一个框架都会有对应的 cli ,俗称脚手架。angular2 本身提供了起步项目 angular2-quickstart,我尝试了一下,发现不是很好用,其它的大部分扩展需要自行安装,之后看了一下 angular-cli 部署简单易用,还提供了快捷搭建项目的目录。
安装
首先,最好先升级 node 到 6.x 可以避免 node 版本过低带来的不必要的麻烦。
|
1
|
npm install -g angular-cli
|
用法
查看所有用法
创建本地开发环境生成和运行angular2项目
|
1
2
3
|
ng new PROJECT_NAME
cd PROJECT_NAME
ng serve
|
PROJECT_NAME 是你自己的项目名
部署成功后不报错的情况下到浏览器 http://localhost:4200/,修改项目中文件后会自动部署
您可以配置默认的 HTTP 端口和一个 LiveReload server 用 --, 形如:
|
1
|
ng serve --host 0.0.0.0 --port 4201 --live-reload-port 49153
|
生成组件、指令、管道和服务
命令以 ng generate 开头,可以缩写为 ng g,下面给出创建 component 的几种方式。
|
1
2
3
4
5
6
7
8
9
10
|
ng generate component my-new-component
ng g component my-new-component
ng g component new-cmp
ng g component ../newer-cmp
|
下表里是所有的命令:
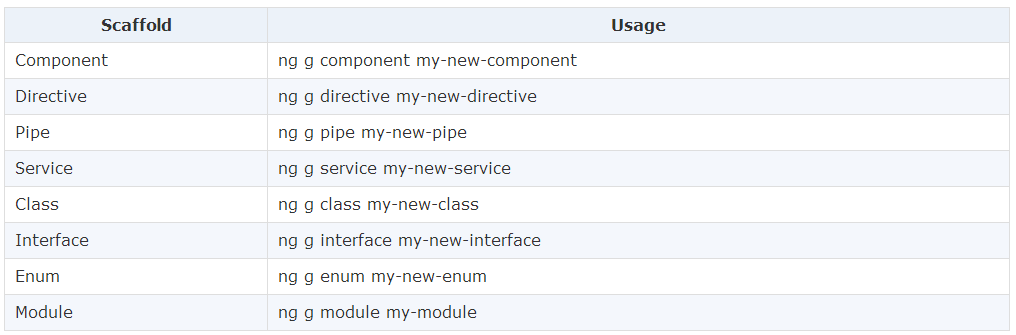
创建路由
这里 cli 暂时禁用了创建路由,新的路由生成器即将到来,您可以在这里阅读新路由器的官方文档:https://angular.io/docs/ts/latest/guide/router.html
建立一个 build
会生成到 dist/ 目录下,其它关于测试,配置文件请大家去仔细阅读,这里只给最基本的搭建流程。
组件实战
看到这你可能已经开始尝试了,创建项目的步骤相信大家参照上文可以轻松解决,这里我先尝试创建一个 component,命令如下。
这里我创建了一个 nav 组件。执行成功后,后台会自动部署。我们看一下文件目录有什么改变
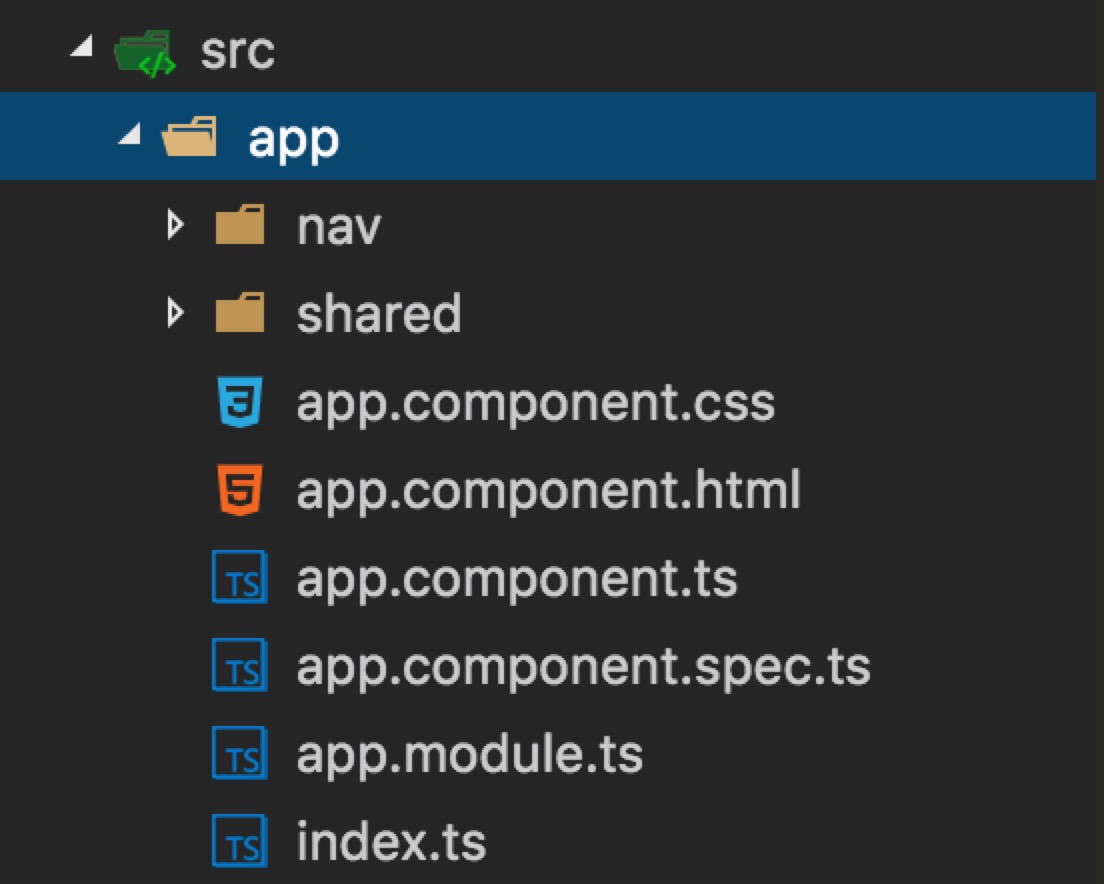
多了一个叫做 nav 的文件夹,看一看文件目录
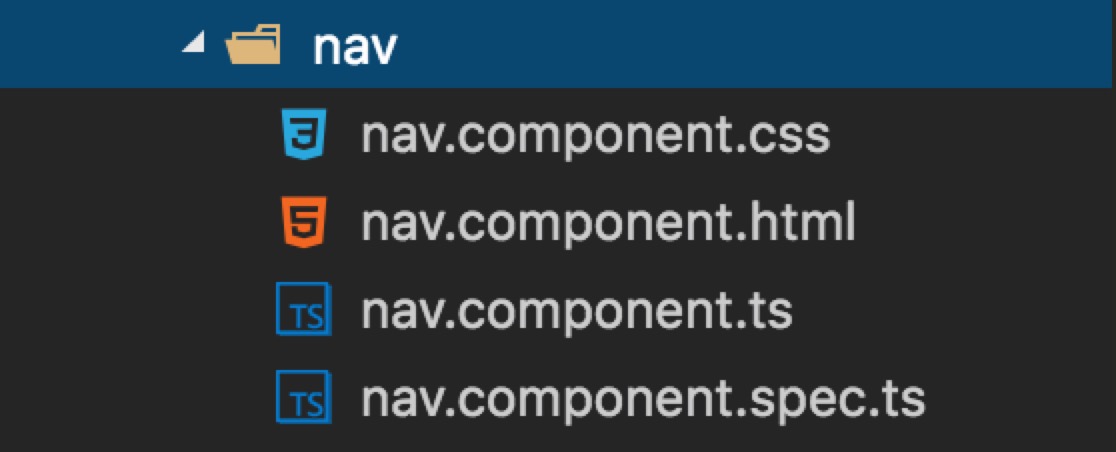
我们发现与项目创建时自带的 app component 目录结构相同,内容也大同小异,大家可以尝试去创建一个自己的组件,组件的样式可以去对应的 css 文件中修改。
这时我的 app.module.ts 变成了如下
|
1
2
3
4
5
6
7
8
9
10
11
12
13
14
15
16
17
18
19
20
21
22
|
import { BrowserModule } from '@angular/platform-browser';
import { NgModule } from '@angular/core';
import { FormsModule } from '@angular/forms';
import { HttpModule } from '@angular/http';
import { AppComponent } from './app.component';
import { NavComponent } from './nav/nav.component';
@NgModule({
declarations: [
AppComponent,
NavComponent
],
imports: [
BrowserModule,
FormsModule,
HttpModule,
],
providers: [],
bootstrap: [AppComponent]
})
export class AppModule { }
|
这里不难看出全局自动引入了 nav.component 组件。我们现在关心的问题是组件之间的引用和数据传输,这里为了简单起见,只给引入的方法,而数据传输、路由机制这里不做解释大家自行官网。
下面说一下 app 内引入 nav 组件,只需要改变 app.component.html 如下。
|
1
2
3
4
|
<h1 class="title">
{{title}}
</h1>
<app-nav></app-nav>
|
这里的 class 在对应的 app.component.css 如下
|
1
2
3
|
.title {
font-size: 100px;
}
|
这时页面自动刷新字号变大 ,那么这里的 app-nav 标签从哪里得到的呢?
我们去 nav.component.ts 里看一眼
|
1
2
3
4
5
6
7
8
9
10
11
12
13
14
15
|
import { Component, OnInit } from '@angular/core';
@Component({
selector: 'app-nav',
templateUrl: './nav.component.html',
styleUrls: ['./nav.component.css']
})
export class NavComponent implements OnInit {
constructor() { }
ngOnInit() {
}
}
|
不难看出 selector: 'app-nav' 说明我们的指令就是 app-nav
此时页面会呈现成这样

好,到这里简单的组件引用已经实现。
引入 Angular material2
文章开头已经阐述了引入 Angular material2 的优点,用过其它组件样式框架的都明白。
安装命令
|
1
|
npm install --save @angular/material
|
在 src/app/app.module.ts 中引入框架
|
1
2
3
4
5
6
7
|
import { MaterialModule } from '@angular/material';
@NgModule({
imports: [MaterialModule.forRoot()],
...
})
export class PizzaPartyAppModule { }
|
引入核心和主体风格,较 Angular material 1.x 的改进在于可以选择不同的色系。
我们这里用的是 Angular CLI 这里又可以钻空子啦,添加下面一行到 style.css,注意是 src 目录下的文件
|
1
|
@import '~@angular/material/core/theming/prebuilt/deeppurple-amber.css';
|
deeppurple-amber 主题颜色是可变的,具体看上文的文档链接。
到这里一直打开控制台(是个好习惯)的朋友会发现类似下面的报错。
|
1
2
3
4
5
|
client:49 [default] J:\workspace\angular2\ts\epimss\node_modules\@angular2-material\slide-toggle\slide-toggle.d.ts:67:19
Cannot find name 'HammerInput'.
client:49 [default] J:\workspace\angular2\ts\epimss\node_modules\@angular2-material\core\gestures\MdGestureConfig.d.ts:4:39
Cannot find name 'HammerManager'.
|
文档也给出了解释,因为框架中 md-slide-toggle 和 md-slider 两个组件依赖外部第三方组件 HammerJS需要额外的配置。
我们不急着用文档给的 npm 或引入 cdn 路径,因为亲测还是会报错,可能我引入方式有误,为了大家少走弯路直接给亲测有效的方法
我们先去命令行工具运行 npm i --save-dev @types/hammerjs
然后编辑 tsconfig.json 文件将 hammerjs 添加到 types 下
|
1
2
3
|
"types": [
"jasmine", "hammerjs"
]
|
到这里发现页面自动刷新后报错消失了,如果需要字体图标可以在 src/index.html 中引入
目前为止,整个 Angular material2 已经整装待发。
我们尝试着添加多个按钮组件测试一下,修改 app.component.html 文件,完整代码如下
|
1
2
3
4
5
6
7
8
9
10
11
12
13
14
15
16
17
18
19
20
21
22
23
24
25
26
27
28
|
<h1 class="title">
{{title}}
</h1>
<app-nav></app-nav>
<button md-button>FLAT</button>
<button md-raised-button>RAISED</button>
<button md-icon-button>
<md-icon class="md-24">favorite</md-icon>
</button>
<button md-fab>
<md-icon class="md-24">add</md-icon>
</button>
<button md-mini-fab>
<md-icon class="md-24">add</md-icon>
</button>
<br/>
<br/>
<button md-raised-button color="primary">PRIMARY</button>
<button md-raised-button color="accent">ACCENT</button>
<button md-raised-button color="warn">WARN</button>
<br/>
<br/>
<button md-button disabled>OFF</button>
<button md-raised-button [disabled]="isDisabled">OFF</button>
<button md-mini-fab [disabled]="isDisabled"><md-icon>check</md-icon></button>
|
没问题这里手懒不写布局样式了,直接给 br 换行大家方便看些,待页面部署完成后我们会看到以下效果
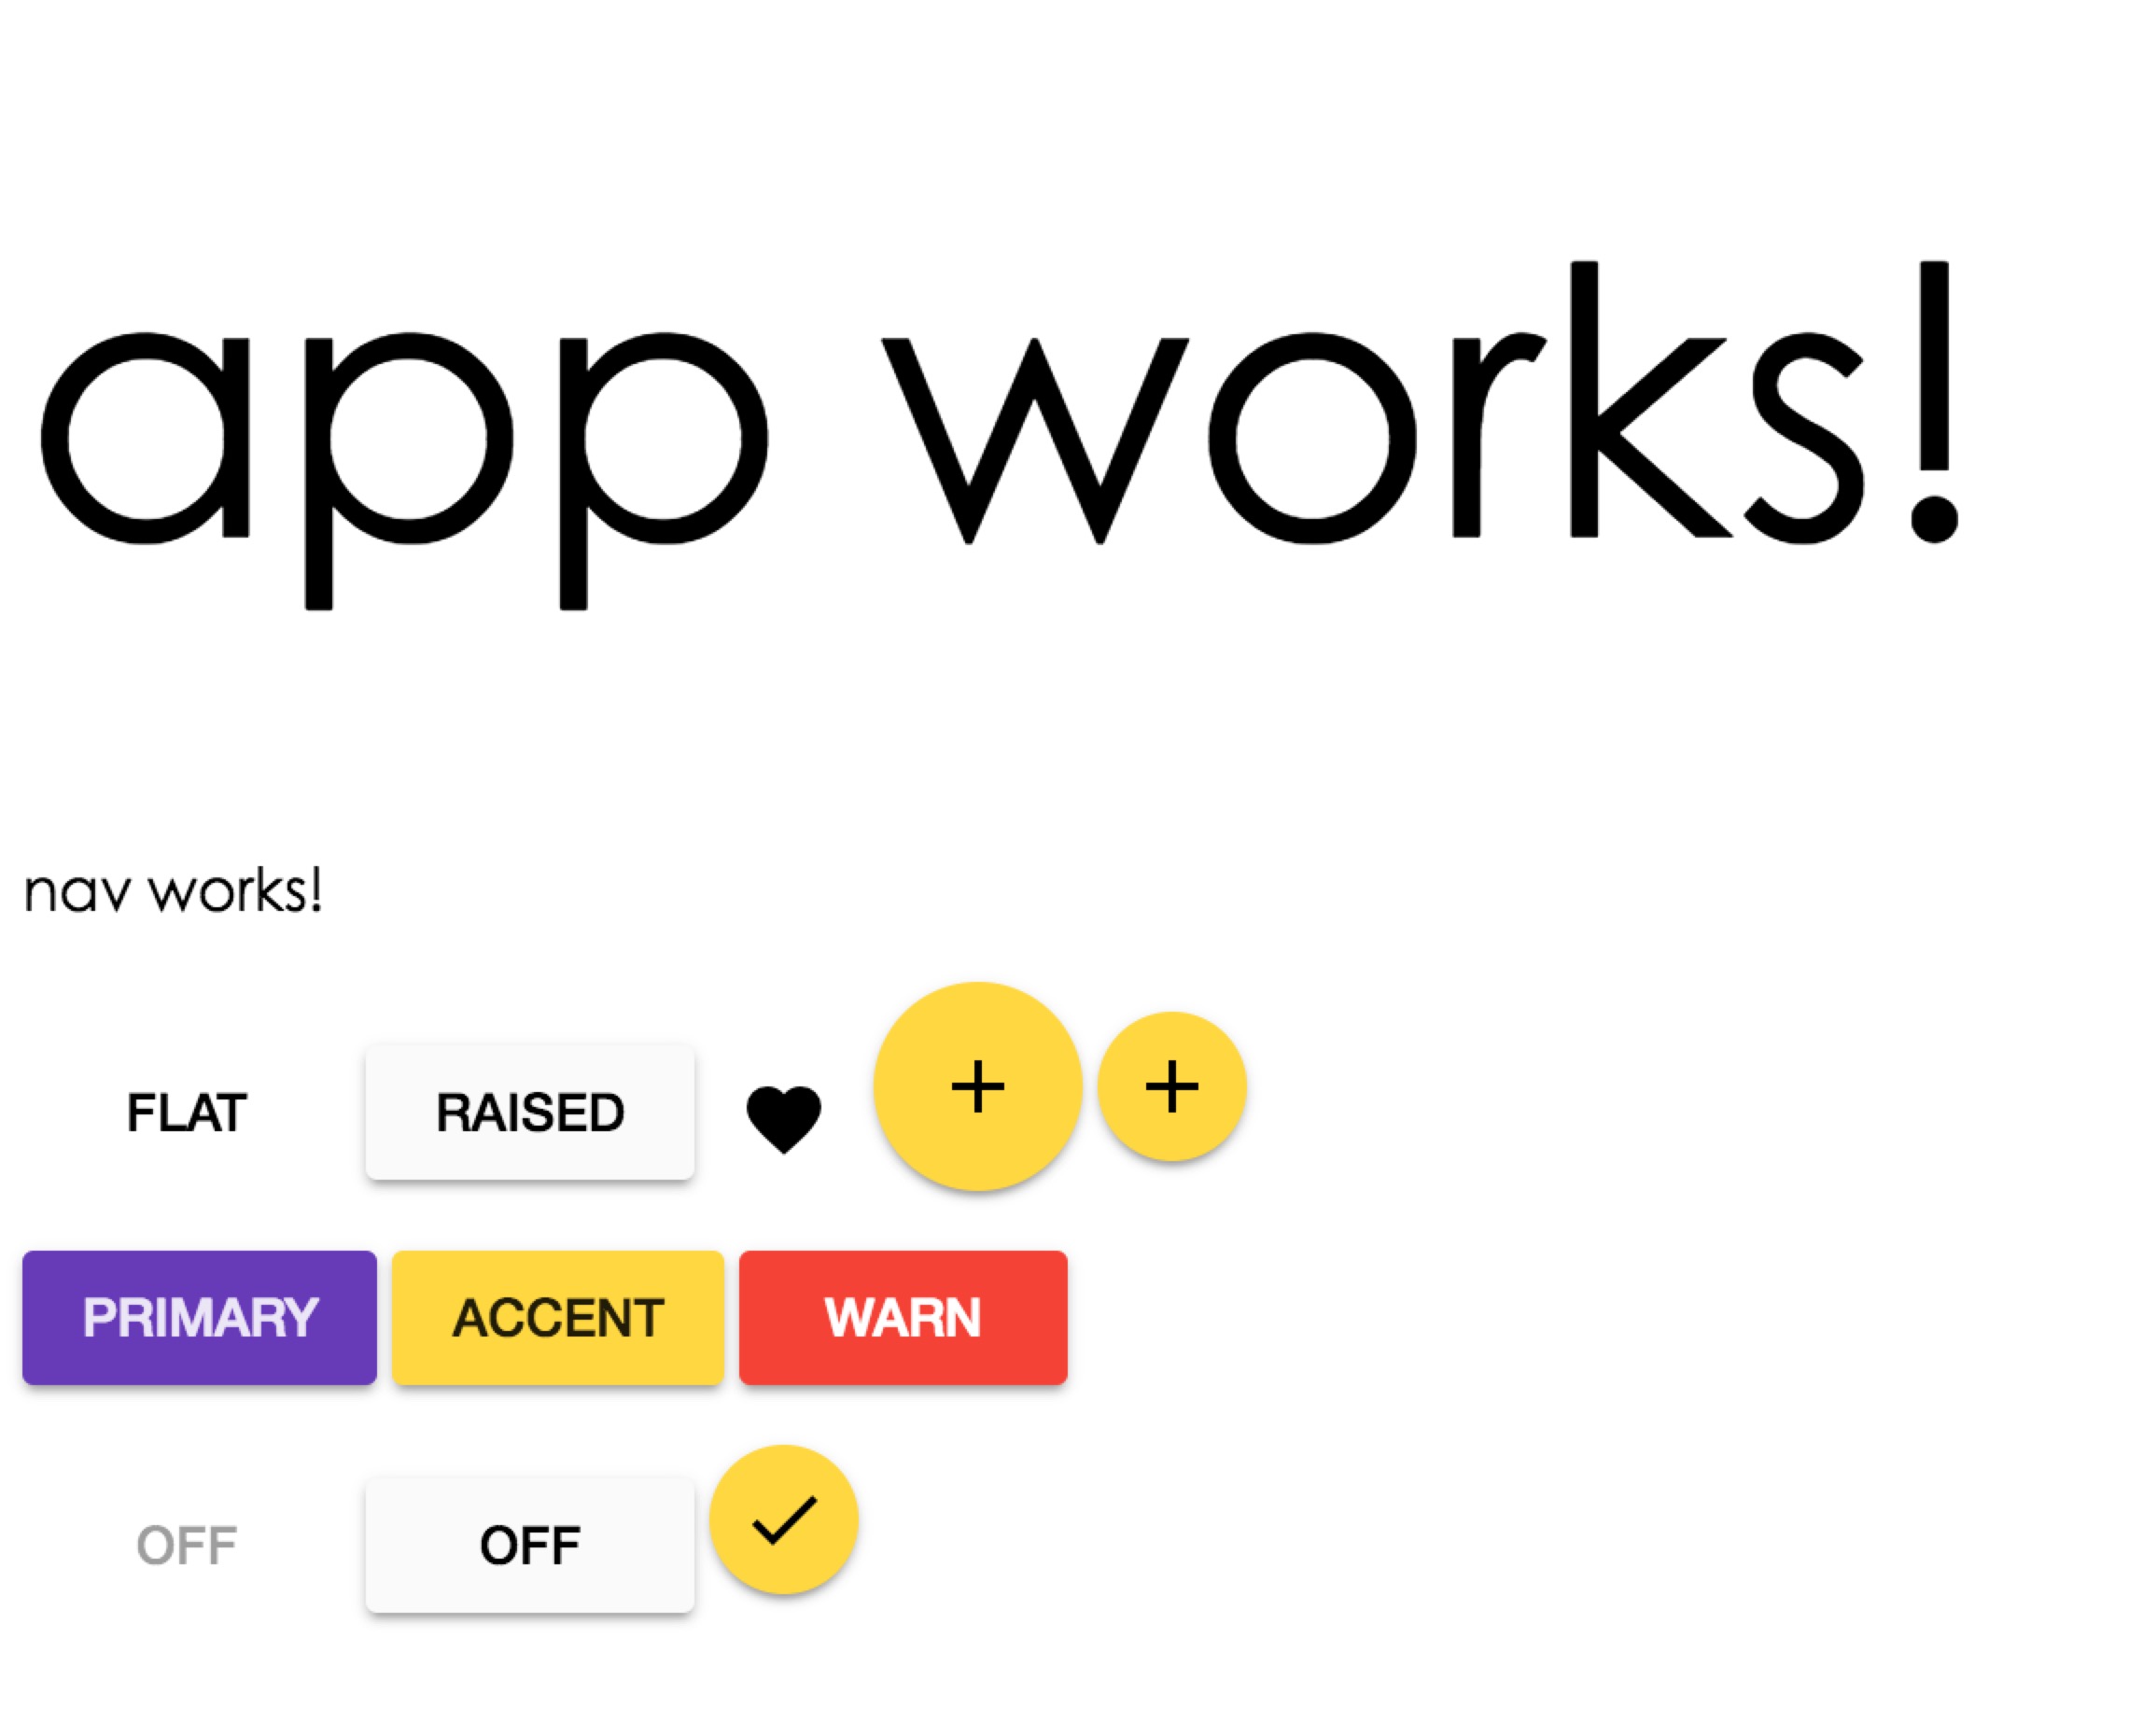
炫酷的组件,更多组件语法参考上面给的链接,到这里相信大家学习 angular2 的信心倍增,真对已有组件可以完成快速开发,下一步就是大家去 Angular2 官网看其它概念的时候啦,处理数据实现与后端对接。项目上线,大功告成。


相关推荐
angular2工程搭建 一、编译和运行环境搭建 1、node.js和npm安装 a、下载地址:https://nodejs.org/en/download/ b、通过node -v 和 npm -v检查是否正确安装 c、下载工程: 略 d、进入工程目录 cd ...
Angular 2环境搭建到快速上手,原来自己花费大量时间需要搭建服务环境,现在可以按步照班,快速搭建环境,快速上手
搭建 Angular 开发环境需要的步骤: Node.js 配置 npm Angular CLI 安装 Node.js 下载安装Node.js ,下载最新的 LTS 版本即可,目前最新的版本是 v6.11.0 LTS 配置 npm 安装好 Node.js 之后需要配置一下 npm 国内...
想接触angular2的在配置环境时经常碰坑。所以我就弄了一个简单的环境。可以直接使用。
课程将从最基本的知识入手,带你搞清楚组件,服务,指令,模块等概念,然后带你在实际开发中学会解决页面导航、服务器通讯、数据展示、表单验证等问题,让你能熟练使用Angular和TypeScript开发组件式单页应用
He has developed numerous such projects, including AngularJS 1.x and Angular 2 style guides, angular2-seed, a static code analyzer for Angular 2 projects, aspect.js, angular-aop, and many others....
主要介绍了详解.Net Core + Angular2 环境搭建,具有一定的参考价值,有兴趣的可以了解一下。
Angular前端环境搭建,快速入门,轻松搭建。 Angular前端环境搭建,快速入门,轻松搭建。
刚搭建完一个webpack+angular2环境,由于angular及webpack官网上没有一个折中的搭建方案,所以只能摸索着搭建,中间遇到一些坑,遂总结记录下来,以供交流。 搭建完后的项目初步环境如下: app ----app.component....
揭秘angular2 中文pdf电子版是一本专业的angular技术书籍,图文清晰,结构明朗,该书覆盖angular基础、架构以及技术应用等各方面知识,内容非常详细,有兴趣的朋友欢迎前来下载!
angular2文档,We developed this book to be used as course material for Rangle's Angular 2 training, but many people have found it to be useful for learning Angular 2 on their own. This book will cover...
下面小编就为大家带来一篇Angular2环境搭建具体操作步骤(推荐)。小编觉得挺不错的,现在就分享给大家,也给大家做个参考。一起跟随小编过来看看吧
...
...
AngularJS2 是一款开源JavaScript库,由Google维护,用来协助单一...AngularJS2 是 Angular 1.x 的升级版本,性能上得到显著的提高,能很好的支持 Web 开发组件。 AngularJS2 发布于2016年9月份,它是基于ES6来开发的。
本文介绍了Angular CLI + Electron 开发环境搭建,分享给大家 用 @angular/cli 配合 Electron 构建桌面软件开发环境,可以在 Electron 中使用 Angular 的各种特性,使开发桌面软件像开发网站一样简单、快捷,而且...