
典型的Android应用程序由两部分构成,一个是在前台运行的Activity和View,一个就是在后台运行的Intent 和Service对象,还有一种是是广播接收器,BroadCastReceiver,我们通常启动一个service(服务)对象或者发送一个广播,都是由Intent 来启动的.
首先来看下怎么用Intent来启动一个服务:
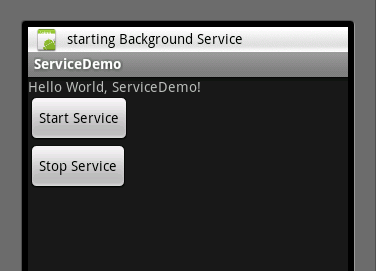
写了一个小例子,在主页面上有两个按钮,一个点击是启动服务,一个点击是取消服务,看了界面,再看一下界面,在看一下源代码的截图.
关于服务需要说明的是:服务中只有onCreate,onStart,和onStop方法,当第一次启动服务的时候调用的是onCreate,onStart方法,停止服务时调用onStop方法,完了之后再启动服务就只需要调用onStart方法了.
- public class Activity01 extends Activity {
- @Override
- public void onCreate(Bundle savedInstanceState) {
- super.onCreate(savedInstanceState);
- setContentView(R.layout.main);
- Button startService = (Button) findViewById(R.id.startBtn);
- startService.setOnClickListener(new OnClickListener() {
- @Override
- public void onClick(View v) {
- startService(new Intent(Activity01.this,
- BackgroundService.class));
- }
- });
- Button stopService = (Button) findViewById(R.id.stopBtn);
- stopService.setOnClickListener(new OnClickListener() {
- @Override
- public void onClick(View v) {
- stopService(new Intent(Activity01.this, BackgroundService.class));
- }
- });
- }
- }
我现在写的这个小服务的功能是满足时间条件后刷新状态栏,具体的说,就是启动服务之后开始计算时间,当时间过了一定的时间点之后就刷新状态栏,因为之前要在程序中做这一块,就写了这样的一个小例子.
先看代码中onCreate方法,声明了一个通知栏管理的对象,然后用了一个handler,这个handler收到message之后静态变量seconds加一,然后更新状态栏。
- @Override
- public void onCreate() {
- super.onCreate();
- notificationMgr = (NotificationManager) getSystemService(NOTIFICATION_SERVICE);
- handler = new Handler() {
- public void handleMessage(Message msg) {
- switch (msg.what) {
- case 1:
- seconds++;
- updateNotification(seconds);
- break;
- }
- super.handleMessage(msg);
- }
- };
- timer = new Timer(false);
- }
但是handler是怎样收到message的呢?这是我们在onStart中创建了一个timer的对象,可以看代码,onStart方法中向通知栏发送一个消息,说明已经启动服务,然后调用run方法,每个一秒钟向handler发送一个消息.handler接收到消息后执行的代码已经在onCreate中说过
- @Override
- public void onStart(Intent intent, int startId) {
- super.onStart(intent, startId);
- displayNotificationMessage("starting Background Service");
- timer.schedule(new TimerTask() {
- @Override
- public void run() {
- Message message = new Message();
- message.what = 1;
- handler.sendMessage(message);
- }
- }, 1000, 1000);
- }
当我去停止服务的时候,向通知栏中发动一个消息,说明停止服务,然后重新置标记服务已经开始了多长时间的变量为0,同时用timer.cancel()方法来停止timer的运行。
- @Override
- public void onDestroy() {
- super.onDestroy();
- displayNotificationMessage("stopping Background Service");
- seconds = 0;
- timer.cancel();
- }
向状态栏发送信息的方法,需要说明的就是这个PendingIntent,刚开始的时候很不理解这个东西,后来终于搞明白了,Intent是发送出去一个任务,我们向状态栏中发送一个消息,状态栏下拉点击的时候我们要让他有什么样的反应,就是需要用PendingIntent来定义,相当于PendingIntent定义的是这个操作被触发的时候需要的指示操作,通俗理解,Intent相当于你跟别人发送一个直接命令,说让别人直接做什么.PendingIntent相当于你给别人一个命令,命令中告诉他当有紧急事件发生的时候做什么,总之有点难理解了.
- private void displayNotificationMessage(String message) {
- Notification notification = new Notification(R.drawable.icon, message,
- System.currentTimeMillis());
- PendingIntent contentIntent = PendingIntent.getActivity(this, 0,
- new Intent(this, Activity01.class), 0);
- notification.setLatestEventInfo(this, "Background Service", message,
- contentIntent);
- notificationMgr.notify(R.id.app_notification_id, notification);
- }


相关推荐
本项目将Android中的Intent总结了一遍。主要有四个项目,Intent_Intent项目是简单的Intent跳转(setActivityResult);Intent_broadcast主要是静态广播的注册;Intent_broadcastdynamic主要介绍动态广播的注册;...
Android中关于Broadcast、Intent 的应用,对于初学Android者有较大帮助。
android intent service 实例android intent service 实例android intent service 实例
android activityIntent 传值 传对象
在Android应用中通过Intent跳转地图应用(百度地图、高德地图),进行路线规划,如果没有安装则打开网页百度地图进行路线规划。
通过一个实验,讲解Android的使用方法,总结详细
android中Intent传递对象的两种方法(Serializable,Parcelable) 简单而又详细的demo,欢迎下载
主要为大家详细介绍了Android利用Intent启动和关闭Activity的相关操作,感兴趣的小伙伴们可以参考一下
android中intent可启动的应用举例2022优秀文档.pptx
Android+Intent机制实例详解 Android+Intent 大家不得不看啊!
Android中使用Intent获取其他应用程序信息的方法介绍.pdf 学习资料 复习资料 教学资源
源程序关于android平台中intent的使用小示例,仅供参考
android Intent例子源码android Intent例子源码android Intent例子源码android Intent例子源码android Intent例子源码android Intent例子源码
Android应用核心Intent
android 利用intent调用activity 简明精炼的例子 传递数据,并且有返回值
三种应用程序基本组件——activity, service和broadcast receiver——是使用称为intent的消息来激活的。Intent消息传递是一种组件间运行时绑定的机制. intent是Intent对象, 它包含了需要做的操作的描述, 或者, ...
本文件介绍的是Anroid中Intent的使用方法,从谷歌中搜索内容;浏览网页;显示地图;路径规划;拨打电话;发送短信等简单功能实现
Android 应用案例——备忘录,通过一个Android基础应用项目综合应用了Android中的各种组件,包括Activity、Service、Broadcast Receiver、ContentProvider、Intent和View的应用 第18章 Android应用案例——无线点餐...
Android+Intent机制实例详解.rar,详细的介绍了,android中的intent知识,可以下载下来看看哟
前言 在sendBroadcast,startActivity时,我们会用到Intent。 Intent可以携带一些数据,比如基本类型数据int、Boolean,或是String,或是序列化...在Intent中传入一个Parcelable对象;例如传入一个bitmap对象。 代